Have you ever wanted to get so close to a sunset that you could touch it? Follow the steps below and have all the colorful sunshine you'll ever need right at your fingertips.
Supplies:
2-3 Nail Polish Colors
Clear Top Coat
Q-Tips
Nail Polish Remover
Make-up Sponges
Scissors
A Bit of Patience
Directions:
1) Trim the make-up sponge to the general height of your finger nails. Starting with your first color, carefully paint a short line near the top of the sponge. Follow with the second color, painting another line beneath the first and finally, finish off with line number three. It should look something like this:

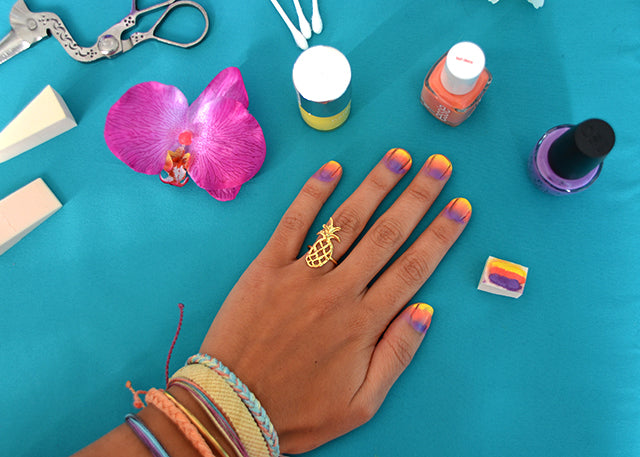
 2) Start lightly dabbing each nail with the painted sponge. This is important to note. Build light layers of color and don't just pile a bunch of polish on all at once. Patience is key here. Dab on one coat, let it dry, re-paint your lines, repeat. Don't worry about the polish staying within the edges of your nails, we'll clean this up later.
 3) Once you're happy with the brightness (I did about 6 coats to achieve this look), let your nails completely dry. Dip a Q-tip in nail polish remover and clean up your edges.
 4) Don't forget this last part! Apply a coat or two of clear polish on top of your masterpiece to give it that final finishing touch and get ready to shine on.
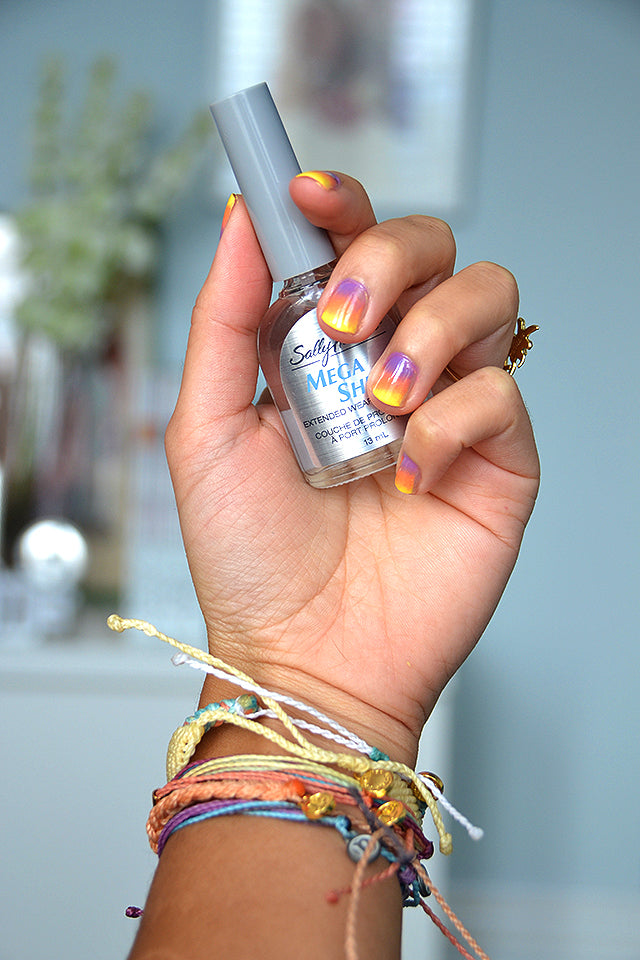
 Pineapple Ring: Tidepool Love
Share this post with someone who loves sunsets.
Pineapple Ring: Tidepool Love
Share this post with someone who loves sunsets.